As I’ve mentioned, this year I’m looking to get more into photography, so I was over joyed when my good friends at Love-Cases offered me a camera backpack to try.
Ideally what I’d like is something I could use when on my motorbike that allows me to have storage space for cloths, gadgets, snacks and drinks as well as compartments for my camera equipment. I didn’t realise such a thing existed, but this Tuff Luv E-Volve backpack is exactly what I was looking for! Lets take a closer look.
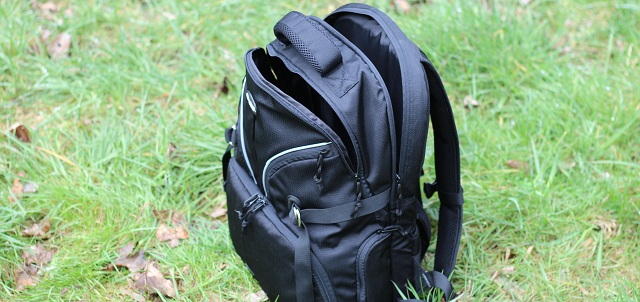
One of the first things I noticed was the shear amount of pockets, sections, zips, clips and straps the bag has.
The main selling point of the bag is the camera compartment in the lower half of the bag. Two zips are used to open it, and must be fully undone allowing the compartment to rotate into view, as opposed to it folding out of the bag. I like how this rotating action works, keeping the balance of the bag while you take or replace items into it.

The compartment is split into thirds by dividers, which are then split again by another divider. Simply removing the Velcro attached divider from the middle section allowed me to fit in my Canon 600D, with space for my two lenses on one side, my flash gun the other and left one segment spare for batteries, remote flash release and whatever else I might need.
Further up the front of the backpack you will find a couple of zipped pockets. You wont get anything too big in here. I tried a mobile battery charger, it wouldn’t fit, it’s more suitable for a spare battery or maybe a filter.
Then, back into the main body, we have the main compartment in the top half of the bag. This is a reasonable size and can fit quite a lot. I don’t see a figure for the size of it, but comparing to other bags I would suggest this section is 5 to 10 litres in size. That might not sound a lot, but means it will easily hold a t-shirt, a phone, wallet, visor spray and other bits and pieces you might need.
Inside the main compartment you will also notice a few pockets, pen slots and such to hold the smaller items.
Also at the top of the backpack you will find another pair of zips, allowing access to a long thin section where you might store your laptop or magazines. My 11″ laptop fitted with ease in here.
On each side of the backpack there is a zipped pocket, with a net drinks holder and a larger net pocket on the other side.
The final cherry on the cake is the rain cover that is attached and tucked away at the base of the back of the bag. My day of testing was rather wet, the rain cover meant not a drop of water made it anywhere near my camera or anything else in the bag.
I did notice that what I presume to be the inside of the cover looked to be reflective silver, so it may be this is what should be on the outside, but I used it black on the outside.
I like that the cover is attached, so I don’t have to worry about it coming off when riding and that it can be tucked away, out of sight, when not needed.
With camera, lenses, laptop, gadgets and more, the bags going to be rather heavy, so how comfortable is it?
Another thing the E-Volve Expedition has plenty of, is padding. Be it the dedicated handle on the top, the back of the bag itself or the shoulder straps, the padding is thick and firm.
The bag is generally very comfortable but what I did find after riding for an hour, the shoulder straps were pressing into my armpits/shoulders a little. This may be more about me being a little bigger than the average person than it is about the bag being uncomfortable.
When the bag is on, you connect a clip at the top of the shoulder straps and another set of straps around your waste, so the back is held in place firmly. It strikes me though that the straps on the shoulder straps could have done with being lower down, holding the should straps over my chest rather than letting them fall into my shoulders.
This was the only real fault I could find with the bag and wasn’t much of an issue. As I said, perhaps on someone with a smaller chest than me, they might not even notice.
If you don’t want to use the waist straps, they can simply be tucked in to a little pocket on the back of the backpack.
All in all, a well made, well padded, feature rich backpack, ideal for the photographer on the move. For £29.99, this is a great buy!
See all the photo’s here.


